 salehunter.net
 There is a distinct sinking feeling that happens when you walk out to your driveway, patio, or sidewalk and notice a brand-new, jagged crack staring back at you. Concrete is celebrated for its durability and strength, but it is entirely unforgiving when it comes to ground movement, temperature fluctuations, and time. For many homeowners, the immediate thought is a sudden, deep panic about the cost. Professional masonry repair can easily run into the thousands of dollars, and a complete slab replacement is a major financial setback.
Fortunately, you do not have to drain your savings to fix those unsightly blemishes. Finding a concrete patch cheap is not just a pipe dream; it is a highly accessible reality for anyone willing to put in a little bit of elbow grease. Armed with the right budget-friendly materials and a few industry secrets, you can perform a professional-grade repair for less than the cost of a decent pizza delivery. This guide will walk you through everything you need to know about affordable concrete repair, ensuring your fix is not only cheap but built to last.
Why Does Concrete Crack in the First Place?

Before you start spreading a cheap concrete patch over a hole, it helps to understand why the damage occurred. Concrete is rigid. While it can support the weight of multiple vehicles, it has very little tensile strength, meaning it cannot stretch or bend. If the ground beneath it moves, the concrete snaps.
In the United States, one of the most common culprits is the freeze-thaw cycle. During wet months, water seeps into the microscopic pores and tiny hairline fractures of your driveway. When winter hits and temperatures drop below freezing, that trapped water turns to ice. Because water expands by about nine percent when it freezes, it acts like a microscopic wedge, forcefully pushing the concrete apart. When the ice melts, it leaves a larger gap, allowing more water to enter the next time. It is a vicious, repeating cycle that turns a hairline crack into a hazardous crater in just a few seasons.
Other common causes include tree roots growing aggressively beneath the slab, lifting and cracking the surface, as well as natural soil settlement over time. Recognizing these causes is crucial because if you have a massive oak tree lifting your sidewalk by three inches, a cheap surface patch will only be a temporary bandage. However, for standard surface spalling, hairline cracks, and moderate chips, budget patching is the perfect solution.
Choosing a Concrete Patch Cheap: What Are Your Options?
Strolling down the masonry aisle of your local big-box home improvement store can be overwhelming. There are dozens of tubs, tubes, and bags, all promising miraculous results. When you are looking for a concrete patch cheap, you need to balance the initial price tag with the effectiveness of the product. Here are the most cost-effective options available:
1. Dry Vinyl Concrete Patch (The Best Budget All-Rounder)
If you want the absolute most bang for your buck, look for bags of dry vinyl-reinforced patching compound. Unlike standard cement, these mixes contain special vinyl resins that significantly improve adhesion and flexibility. Because you are buying a dry powder and adding your own water, the cost per ounce is incredibly low. A small bag usually costs under ten dollars and can patch dozens of cracks. It requires a bit of mixing, but the savings are well worth the two minutes of stirring.
2. Pre-Mixed Concrete Patching Tubs
For ultimate convenience, pre-mixed acrylic concrete patches come in small tubs that look similar to drywall mud. They are slightly more expensive than dry mixes because you are paying for the water and the convenience of a ready-to-use product. However, if you only have a few minor chips on your patio or front steps, a five-dollar tub is a fantastic, cheap solution that saves you from buying specialized mixing tools.
3. Liquid Polyurethane Crack Sealants
If you are dealing with horizontal cracks in a driveway or pool deck rather than deep holes, a self-leveling polyurethane sealant is your best friend. Supplied in a caulk tube, these sealants flow beautifully into the crack and level themselves out perfectly. They dry with a slight rubbery flexibility, which allows them to stretch during the next freeze-thaw cycle without breaking. At roughly eight to twelve dollars a tube, they offer high-tier protection for a very low cost.
Lesser-Known Money-Saving Hacks for Concrete Repair
Getting a concrete patch cheap isn’t just about buying the least expensive product; it is also about how you use it. Professional masons use a few clever tricks to stretch their materials and ensure the patch doesn’t fail, which ultimately saves money on re-doing the job.
- The Backer Rod Trick: If you have a crack that is deeper than half an inch, filling the entire void with liquid sealant or patching compound is a massive waste of money. Instead, go to the weatherization aisle and buy a foam “backer rod.” It looks like a miniature pool noodle. Press this cheap foam deep into the crack, leaving only a half-inch of space at the top. You can then apply your patching material over the foam. You will use a fraction of the expensive patch while achieving a better, more flexible result.
- Sand as a Filler: If you are patching a wide, deep hole and don’t have a backer rod, you can use regular playground sand or fine gravel to fill the bottom two-thirds of the hole. Tamp it down tightly, and then apply your cheap concrete patch over the top.
- Avoid Pure Cement: Never try to patch a hole with standard Portland cement or basic concrete mix just because it is cheap. Standard concrete does not contain the bonding agents required to stick to old, cured concrete. It will dry, shrink, and pop right out like an ice cube from a tray, wasting both your time and your money.
Step-by-Step Guide: How to Apply a Cheap Concrete Patch Perfectly
The difference between a budget repair that lasts a decade and one that fails in a month comes down entirely to your preparation and application technique. Follow these steps to ensure your affordable repair holds strong.
Step 1: Relentless Preparation
You cannot patch over dirt, grease, or crumbling rock. Grab a stiff wire brush and vigorously scrub out any loose debris, pebbles, or moss that has taken up residence in the fissure. If you have a pressure washer, now is the time to fire it up and blast the area clean. A clean surface is the absolute non-negotiable foundation of any successful concrete repair.
Step 2: The Chisel Undercut (The Pro Secret)
Here is a secret that costs absolutely nothing but guarantees a permanent fix. Take a cold chisel and a hammer, and gently chip away at the edges of the crack. Your goal is to widen the bottom of the crack slightly more than the top, creating an inverted “V” shape. When you push your concrete patch into this undercut groove, it becomes physically locked into the slab as it hardens. It will never pop out, even under heavy traffic.
Step 3: Moisture is the Key
Concrete acts like a dense sponge. If you apply a wet patch to bone-dry concrete, the old concrete will aggressively suck all the moisture out of your patching compound before it has a chance to cure properly, resulting in a weak, powdery patch. To prevent this, use a spray bottle or a hose to mist the old concrete until it is damp, but ensure there is no standing water pooled in the crack.
Step 4: Mixing and Application
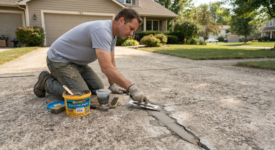
If you are using a dry vinyl patch, mix it in a cheap plastic bucket using a margin trowel. Add water very slowly. You are aiming for the consistency of thick peanut butter—wet enough to spread, but stiff enough to hold its shape without running. Use your trowel to aggressively press the mixture deep into the crack. Do not just lay it gently on top; you want to force out any trapped air bubbles. Overfill the crack slightly, and then use the flat edge of the trowel to scrape it flush with the surrounding surface. Feather the edges by pressing down firmly so the transition between the old concrete and the new patch is completely seamless.
Step 5: The Crucial Curing Phase
This is where most DIYers fail, turning a great, cheap concrete patch into a disaster. Cement-based products do not “dry” like paint; they undergo a chemical reaction called hydration to harden. This reaction requires moisture. If your patch dries out too quickly in the hot sun, it will crack and flake. Once you finish your repair, mist it lightly with water and cover it with a piece of cheap plastic sheeting (a cut-up garbage bag works perfectly). Weigh down the edges with rocks or bricks and leave it for a few days. This traps the moisture inside and forces the patch to cure slowly, resulting in maximum strength.
Cosmetic Fixes vs. Structural Nightmares
While finding a concrete patch cheap is ideal for standard wear and tear, it is important to be realistic about what a budget repair can and cannot do. If your driveway has a hairline crack, surface flaking (spalling), or a small chunk missing from a step, a cheap patch is exactly what you need.
However, if one side of the crack is significantly higher than the other (a tripping hazard), or if the crack is wider than two inches and continues to grow, you are dealing with a structural failure of the sub-base. The soil underneath has likely washed away or collapsed. In these scenarios, filling the gap with cheap patching compound is like putting a band-aid on a broken leg. The ground will continue to shift, and your patch will break within weeks. For major structural sinking, you may need to look into mudjacking or polyurethane foam leveling, which, while more expensive than a DIY patch, is still vastly cheaper than replacing the concrete.
Protecting Your Investment
Once you have successfully applied your cheap concrete patch, you want to make sure you do not have to repeat the process next year. The absolute best way to protect your concrete and prevent future cracks is to seal it. Water is the enemy of concrete. By applying a penetrating silane-siloxane concrete sealer every few years, you create an invisible waterproof barrier that forces rain and melting snow to bead up and roll off, rather than soaking into the pores. A good sealer is an inexpensive insurance policy for your driveway.
Additionally, check your home’s gutter downspouts. Ensure they are directing rainwater well away from your concrete slabs. Constant water runoff eroding the soil beneath your driveway is a leading cause of foundational cracking.
Final Thoughts on Budget Concrete Repair
Home maintenance does not always have to be a major financial burden. Repairing your concrete surfaces promptly not only restores the curb appeal of your property but also prevents minor water intrusions from evolving into catastrophic structural failures. By choosing the right vinyl-reinforced or polyurethane materials, employing professional undercutting and backer-rod techniques, and respecting the hydration and curing process, you can achieve incredibly durable results on a shoestring budget.
The next time you spot a jagged line forming on your walkway, skip the panic. Grab your wire brush, pick up an affordable concrete patch, and take control of the repair. With a little patience and the right technique, your concrete will look great, stay strong, and your wallet will remain happily intact.