

 salehunter.net
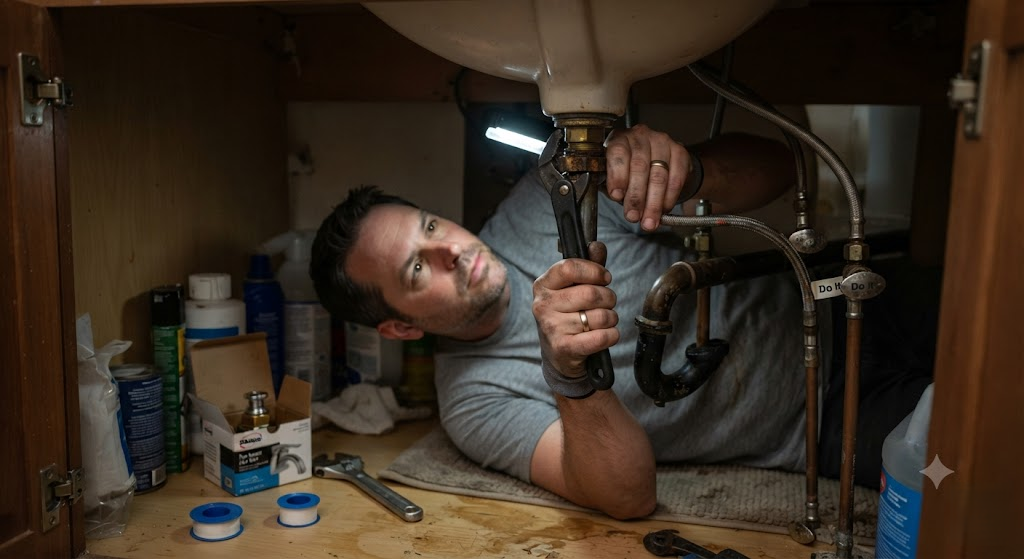
 Replacing a leaky faucet or tightening a loose water supply line should conceptually be a straightforward, painless task. However, anyone who has ever slid on their back into the dark, cramped cabinet beneath a kitchen or bathroom sink knows that the reality of plumbing is far different. Standard adjustable wrenches, pliers, and socket sets simply cannot reach the mounting nuts tucked tightly between the deep sink basin and the back of the cabinet wall. Enter the basin wrench—a specialized, odd-looking tool designed to solve this exact geographical nightmare.
For the professional, union plumber who spends forty hours a week under sinks, investing in a high-end, premium-brand basin wrench is a logical business decision. But for the weekend DIY warrior or the homeowner tackling a one-off leaky fixture, spending top dollar on a single-use plumbing tool often feels completely unjustified. This is exactly where the hunt for a reliable yet cheap basin wrench begins. Finding an affordable option that actually grips the hardware, holds up to moderate torque, and gets the job done without slipping and stripping your plumbing fixtures requires knowing exactly what to look for and what to avoid.
The Anatomy of the Plumber’s Friend
Before diving into the budget market and comparing prices, it is crucial to understand how this highly specialized tool functions. A basin wrench looks somewhat like a medieval tool or a strangely modified metal claw on a stick. It consists of three primary structural components that must work together seamlessly:
- The Jaw Head: This is the business end of the tool. It features an asymmetrical, spring-loaded gripping mechanism designed to grab onto hex nuts or knurled nuts of various sizes. This head pivots up to 90 degrees, allowing you to approach the under-sink nut from a vertical angle while turning horizontally.
- The Shaft: A long, narrow metal rod that extends your reach high up behind the sink basin, bypassing P-traps, garbage disposals, and drain pipes.
- The T-Bar Handle: Located at the base of the shaft, this sliding crossbar provides the mechanical leverage needed to loosen stubborn, calcified nuts or tighten new ones securely into place.
The Economics of Plumbing Tools: Why Go Cheap?
Hand tools are generally an area where the old adage “you get what you pay for” holds incredibly true. Professional-grade basin wrenches are built from heavy-duty drop-forged steel, feature precision-machined teeth that never dull, and often include rugged telescoping shafts that extend to accommodate unusually deep sink cabinets without bending.
However, basic economics play a role in DIY home maintenance. If you are a homeowner replacing a bathroom vanity once a decade, dropping professional-level cash on a tool that will subsequently gather dust in the dark bottom of a toolbox is poor financial planning. A cheap basin wrench, often available for a fraction of the cost at local hardware stores or massive online marketplaces, serves a very specific and targeted purpose: completing a single, localized job successfully.
The goal is not to buy a tool that will survive daily abuse on rough construction sites, but rather to find an inexpensive piece of metal that will successfully bite into a plastic or brass nut, hold its grip firmly, and turn it just enough to solve your immediate plumbing problem. The inherent challenge is that the budget market is flooded with poorly manufactured, imported tools that bend, slip, or snap under the slightest pressure. To navigate this successfully, you must learn to distinguish between a cost-effective utility tool and a completely useless piece of scrap metal.
Critical Features to Evaluate in Budget Models
When evaluating a cheap basin wrench, do not look at the brand name or the packaging. Instead, your focus should be strictly on the jaw mechanism and the structural integrity of the shaft. Here is exactly what you need to scrutinize:
Jaw Material and Tooth Design
The most common point of catastrophic failure on an inexpensive basin wrench is the jaw. Budget manufacturers often cut production costs by using stamped steel rather than drop-forged steel. Stamped steel jaws lack the hardened, durable teeth necessary to bite into smooth, stubborn brass nuts. If you are shopping for a cheap basin wrench in a store, closely inspect the teeth before checking out. They should be sharply defined, deeply cut, and aggressively angled. If the teeth look rounded, painted over, or smooth right out of the package, the wrench will inevitably slip. Slipping not only frustrates you, but it rounds off the edges of the mounting nut, potentially turning a ten-minute installation job into a multi-hour nightmare.
Spring Tension and Reliability
The jaw head of a traditional basin wrench operates on a cam-action, spring-loaded design. The spring actively holds the pivoting jaw against the nut, allowing you to use the tool blindly with one hand while lying on your back. In cheaper models, this spring is often weak, prone to rusting, or improperly tensioned at the factory. A weak spring means the jaw will not automatically grab the nut when you apply turning pressure. When purchasing an affordable model, manually test the spring. It should snap back firmly and aggressively hold the pivoting jaw tightly against its base. If the jaw flops around loosely, leave the tool on the shelf.
Shaft Rigidity: Fixed vs. Telescoping
You will generally find two types of shafts on the market: fixed and telescoping. Telescoping shafts are incredibly convenient for deep cabinets because they can extend from 10 inches up to 17 inches. However, in the budget price range, the locking mechanisms on telescoping shafts are notoriously weak and prone to failure. A cheap telescoping wrench will often collapse on itself or twist dangerously at the locking joint when you apply torque to a stuck nut. For budget-conscious DIYers, a fixed-shaft basin wrench (typically measuring around 10 to 11 inches long) is highly recommended. The solid, unbroken piece of metal offers superior rigidity and transfers your turning torque much more efficiently than a flimsy telescoping mechanism.
The Sliding T-Bar Handle
The crossbar at the bottom of the wrench is where you apply your physical turning force. Cheap basin wrenches sometimes feature hollow or incredibly thin aluminum T-bars that bend under moderate pressure. Look for a solid steel, sliding T-bar. The sliding feature is absolutely essential because it allows you to adjust your leverage dynamically when working around pipes, large basin curves, and garbage disposals that frequently crowd the under-sink environment.
Lesser-Known Tips for Maximizing a Cheap Basin Wrench
Just because you purchased an inexpensive tool does not mean you are doomed to sub-par results. There are several professional techniques and “tricks of the trade” that experienced plumbers use to coax maximum performance out of lower-tier tools.
The Tape Trick for Slippery Nuts
One major issue with budget basin wrenches is that their imperfectly machined teeth struggle to grip smooth chrome or old brass nuts, particularly those covered in a slick layer of condensation or calcium buildup. To combat this effectively, wrap the stubborn nut tightly with a single layer of masking tape or rough electrical tape. The tape provides a slightly textured, compressible surface that allows the duller teeth of a cheap wrench to bite in and gain vital traction without slipping off the metal.
Lubricating the Pivot Joint Before Use
Budget tools rarely come properly lubricated from the overseas factories where they are manufactured. Before sliding under the sink and getting to work, apply a few drops of penetrating oil or heavy-duty silicone spray to the pivot pin and the coil spring of your new basin wrench. Work the jaw back and forth aggressively to distribute the lubricant. This simple, preventative step ensures the jaw flips easily into position and snaps shut on the nut with maximum force, compensating for the cheaper manufacturing tolerances.
Adding Leverage Wisely
If a mounting nut is totally seized by rust or years of hard water deposits, the short T-bar on a budget basin wrench might not provide enough natural torque to break it free. While professionals might use a specialized cheater bar, a DIY workaround is to carefully slip the hollow end of a small metal pipe over one side of the T-bar, or use the metal shaft of a heavy-duty screwdriver to extend the lever. However, you must exercise extreme caution when doing this with a cheap wrench. Because the metal is likely softer steel, applying massive, sudden torque with an extension bar can actually twist the main shaft of the wrench or snap the jaw pivot clean off. Apply pressure slowly, steadily, and smoothly.
Common User Errors to Avoid
Many first-time users angrily blame their budget tool for installation failures that are actually caused by user error. Using a basin wrench requires a specific technique and spatial awareness.
- Flipping the Jaws Incorrectly: The jaws of a basin wrench are strictly directional. They only grip and apply force when turned in one specific direction. If you are trying to loosen a nut (turning counter-clockwise) but the jaw is flipped to the tightening position, the teeth will simply slide helplessly over the metal no matter how hard you push. The open mouth of the jaw must always face the direction you intend to turn.
- Over-tightening Plastic Fittings: Modern budget faucets frequently utilize plastic mounting nuts instead of traditional heavy brass. A metal basin wrench, even a cheap one, can easily crush, deform, or crack these plastic nuts if too much brute force is applied. When tightening new plastic fittings, rely only on the leverage of your fingertips on the T-bar, rather than using the strength of your whole arm.
- Ignoring Preparatory Chemical Steps: A basin wrench is a mechanical turning tool, not a magic wand. If a nut has been fused to a faucet shank by twenty years of hard water scale and deep corrosion, a cheap basin wrench will likely strip the nut before breaking it free. Always prepare the area by generously soaking the exposed threads in a high-quality penetrating oil or a strong solution of white vinegar to dissolve the calcium buildup. Let it sit for at least an hour before attempting to turn it. This preparation drastically reduces the required torque, saving both your cheap tool and your knuckles.
Modern Alternatives to the Traditional Metal Wrench
If you are struggling to find a traditional metal basin wrench that fits your budget and meets minimum quality standards, it is highly worth looking into modern, multi-purpose plumbing tools. In recent years, hardware manufacturers have introduced tubular plastic plumbing wrenches, such as the widely popular Ridgid EZ Change or various generic equivalents found online.
These modern tools look like long, hollow, slotted plastic cylinders. They are specifically designed to slide directly over braided water supply lines and engage the mounting nuts directly from below. For many amateur homeowners, these heavy-duty plastic multi-tools are actually cheaper than a traditional metal basin wrench and significantly easier to understand and use. Because they encapsulate the entire nut rather than gripping it from just one side like a claw, they distribute turning torque evenly and are much less likely to strip the plastic mounting nuts that are increasingly common on modern bathroom fixtures. While they do not have the universal versatility or raw, aggressive gripping power of a steel basin wrench for handling decades-old brass fittings, they are an excellent, highly affordable alternative for standard, modern DIY installations.
Tool Maintenance and Longevity
Once your DIY plumbing repair is finally complete and the sink is running leak-free, do not simply toss your cheap basin wrench into a damp basement corner or a dark garage drawer. Cheap carbon steel is highly susceptible to rapid oxidation and rust, and a rusted pivot joint will render the tool completely useless the next time a faucet starts leaking.
Take two minutes to wipe the wrench down with a dry shop rag to remove any moisture, pipe dope, or plumbing putty. Apply a very light coat of multi-purpose oil or spray lubricant to the metal jaws, the tension spring, and the sliding T-bar before storing it in a dry, climate-controlled toolbox. This minimal, proactive maintenance ensures that your budget investment will survive intact to fight another plumbing battle years down the road.
Final Thoughts on Budget Plumbing Solutions
Tackling under-sink plumbing issues is rarely an enjoyable experience for anyone, but having the right tool makes the job exponentially less frustrating. You simply do not need to spend a small fortune to successfully remove a standard faucet mounting nut. By knowing exactly how to identify solid jaw construction, prioritizing a rigid fixed shaft over a flimsy telescoping one, and utilizing smart, professional leverage and gripping techniques, a cheap basin wrench can perform just as admirably as its premium-priced counterparts. Take the time to physically inspect the tool before purchasing it, apply a little mechanical ingenuity and preparation to the rusted nuts, and you can achieve a perfect, leak-free sink repair without breaking the bank.